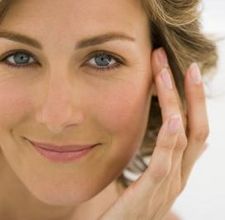
Friday, September 9, 2011

The True Secret to Getting Flawless Skin


-with makeup-


Doesn’t it seem like supermodels, famous actresses and celebrities have beautiful, perfect skin in every single picture taken? Don’t you ever wonder why your face can’t be as perfect? Well, think again! All those famous people in front of a camera know the true secret to getting that flawless, acne-free, blemish-free face that we all want, and I know just the way to get their face!

Keep on reading to see how us women’s secret weapon, a.k.a. Makeup can really help our face look young, healthy, and picture ready!


When breakouts are strictly forbidden…


We all tend to have breakouts every now and then. This is especially due to hormonal reasons, and every month we might or might not get those annoying blemishes that could completely ruin our night out.  But don’t be afraid of those hateful dots on our face! With the perfect concealer, you can truly pull out beautiful skin and nobody will even notice these slight imperfections.

Here’s what the pros are using:
I haven’t personally tried this product myself, but I plan on doing to in the near future! Most professional makeup artists are amazed by Almay Nearly Naked Cover Up Stick , which you can find here: Almay Nearly Naked Cover Up Stick 


How should I apply my concealer?
When applying concealer, use a concealer brush! These small yet slim brushed are designed professionally to help smooth out the product and cover entirely the place you’re applying it to. Since they are small, they’re able to fit into tight places like the corners of your nose and where you need more coverage.


Where should I apply concealer?
To start off, apply your concealer under your eyes to eliminate those bags under your eyes. If you need extra coverage, then add another thin layer to the one you have already applied.

Tip: You should always apply concealer AFTER you have applied foundation to your face, since this will help the product stay in place and help blend in with the under base coat the foundation has given you.

Also, apply your concealer on the corners of you nose where there is redness, as well as a bit on your chin. After you’ve covered up these areas, start by tapping over any redness around your face such as blemishes or freckles that can make your face look uneven and imperfect.

Did You Know?
The first ever concealer to be invented was from Max Factor back in 1938! It was called Max Factor’s Erace. Seems like makeup has been in the market for quite a long time now!


Foundation Is The Best Creation


Using the right foundation for your skin color is going to really help you get silk-like skin. When choosing your foundation color, try to find a color that is very close to your natural skin tone. If you’d like a natural slight tan to your face, then using a foundation just one skin-tone darker is best for you. If you’re looking for a photoshopped picture-perfect face, then use one shade lighter, or something very close to your skin tone.

Top Beauty Secret:
Using a translucent powder after applying foundation is a great way to help set the makeup and give you a clean, perfect face. Just apply the loose powder with a kabuki brush or any powder brush you might have, and tap it on your cheeks, forehead, face and chin. Don’t worry if it’s uneven; just go over the powder again to help blend it in into your foundation.


Just like your concealer, using a foundation brush to spread it through your face evenly is the best way to get the best results. Is you’re running late, then using your fingers to quickly sweep it through your face is also a good option.

Tip: When applying your foundation, make sure to slide it evenly down your neck line and ear line to help the color blend into your natural skin color, and to avoid making your face look like it’s been painted on. We all want natural looking, flawless skin so making sure that it blends into our natural skin tone is the right way to apply foundation.


Prime to Help You Shine


Before applying anything on your face, make sure to use a face and eyelid primer. This will help your makeup last longer, since it’s sweat proof and smudge proof, and also avoids any creasing on the eyes or wrinkles on your face. You’ll definitely notice the difference when you apply your foundation afterwards, as it will apply on smoother and silkier.

Tip: Also, after you’ve applied all your makeup, using a stay-in spray such as the Mist and Set from e.l.f Studio’s makeup line is a great option when going out or staying under the sun too long. Just spray it evenly onto your face afterwards, and enjoy a non-smudge face all day!


Contouring and Highlighting Your Features


Now the true secret to your everyday makeup routine is how you help give light and shadows to your face. This is essential to any makeup application, since your face is graphically designed to help you outline your features and give it some light to play with when being on pictures or for an everyday look.


The Complete Contouring Steps for Night Outs

After you have applied your foundation and concealer, take a contouring brush. Depending on your skin tone, find the right blush tone to help create a tanned or bronzed look.

Bronzer Blush


-Pout your cheeks outwards in an attempt to help find the hollows of your cheeks. Run your brush right under your cheekbones, using a window wiper motion. Now take that same brush and run it over your temples, helping the color blend into your hair line and into your forehead. This will give you a more natural look and create a shadow to help your features stand out.

-With that same brush and using the same amount of blush applied before, run what’s left over of the product under your jaw line to create another small shadow on your face. This helps create the illusion of a stronger and finer jaw line.

Now, do the same on the other side

Flushed Cheeks


-Using a peach to pink color for fair skin, a pink to dark pink color on medium skin, and a brown tone with red undertones for dark skin, apply the amount you desire right on the apples of your cheeks. To help you find your apples, smile in the mirror and blush away, blending it into the bronzer you applied earlier.
-Create a V-shape starting from your brow bone to your cheek, giving you a sun kissed blush. 

Highlighting


-Now for the final step, apply some white to vanilla cream colored blush onto the same contouring brush and run in right above your peachy color, making sure to accentuate your eyes and give some light under them.

-Run a fan brush onto your nose, concentrating on creating a thin line right in the middle, and finally a bit your chin if you’d like.

Highlighting your face will help create light onto the places that need it the most. Brightening up your face like this will help you appear fresh and healthy under a camera or in pictures.

Weird Beauty Fact:
There was a phase around 3000 BC where ‘pale look’ was considered fashionable. This was achieved by bleeding themselves! Leeches were used. (Ugh, just disgusting!) Or an extreme ‘cupping’ method was used. A vein was slashed and blood was drained into a bowl. Okay this may sound pretty extreme, but get a load of this: Demi Moore admits to using Austrian leeches to look young and beautiful! So much for makeup beauty!


Contouring Your Face for an Everyday Look

If you’re just going for an everyday look, then use either step one or step two only. If you want a more dramatic look, then blend the two together, but it you’re going for a look you can wear every day, then using just a bit of peach colored blush on your cheeks is a great way for a healthy, natural look.

Also, highlighting just under your eyes and outwards towards your temples is a great way to get rid of over night bags under your eyes or tiredness quick.

Fun Fact:
This 21st century obsession on having flawless skin isn’t something new to us humans. Image that way back, the ancient Romans hated wrinkles, sun spots, freckles, and any blemishes or imperfections on the face. They used swans’ fat or asses’ milk to soften and eliminate wrinkles, and the ashes of snails (which they burnt up themselves) were used to “cure” sores and freckles! Pretty unique, huh? And all this time I thought wanting to have perfect skin was a recent taboo.


Lips They’ll Want To Kiss


We ALL want voluptuous, thick lips that can really stand out. To create a perfect, pumped lip, you’ll need white eyeliner, lip balm, your favorite lipstick color, and a lip liner.

1.       Using lip balm before you apply your lipstick is a great way to help the color stand out more, and also to help your lips if you tend to have cracked or chapped lips.

2.       Line your lips with a darker colored lipstick. Ensure to line your curves on your upped lips the most, since this is what will give your lips that pouty, big lips look.

3.       Now take your lipstick and run it evenly through your lips. Using lipstick instead of just a lip gloss is great in make ways:

a.       It lasts longer than lip gloss does
b.      The color makes your lips stand out and make them look bigger and thicker
c.       It gives you a more finished look.

4.       Finally, with your white eyeliner, line the outer side of the curves of your upper lip, and blend it in with your finger or a smudge brush. This little tip will help you get those Angelina Jolie lips.

5.       Use gloss if you’d like.


Miss Eye Perfection


Smudge-Proof Eyes to Die for

To get your eyes to stay the way they were once you finished applying makeup, using waterproof items such as waterproof mascara and eyeliner is the best way to help them stay that way.

When using black eyeliner on your eyes, apply black eye shadow over the liquid or gel eye liner to help set the color in better.

If your eye lashes are on the thinner and smaller size, use big, thick false lashes to give your eyes an amazing look. Just apply lash glue to the thin line, wait 20-30 seconds for it to be gooey and sticky, and then apply them on using tweezers to help them in place.

Give Your Eyes Natural Light


Three simple ways to give them light and brighten them up:
1.       Using white eyeshadow, apply it with a blending brush over your brow bone to accentuate your eyebrows and widen your eye.

2.       With that same eyeshadow, run it over your teardrop and face it into your lid.

3.       Finally, with a white eyeliner, line your waterline with it to create a bigger looking eye.

4.       Finish off with eye makeup to help the look seem more natural.


And you’re done! By now you should have a clear and perfect idea of what a photoshopped face is like in real life! These tips are great to help your face seem brighter, tanned, and picture-perfect. Hope this helped and good luck!


Extra Beauty Tips:

-Don't slather on lots of lotions and give your skin a hard time. A pea-sized amount is ideal. Too many chemicals can simply increase pimples and oiliness. Keep your routine simple and easy. Just washing your face with warm water, patting it dry and applying some simple face cream can do wonders.


-Exercise. Exercise not only keeps you in shape, but it helps your skin maintain a fresh and healthy glow by regulating the oxygen. Be sure to avoid wearing make-up when you exercise. Sweat and dirt will get trapped in your pores and cause you to break-out.


-Chill out. Stress can cause acne and pimples. Take some time each day to kick back your feet, take a nap, and relax. If you're having stress problems, confide in a friend, doctor or family member you can trust.


-Always remove your makeup. Makeup clogs your pores as you sleep, causing things such as pimples and blackheads. No matter how tired you are, always clean off your makeup, right down to the very last bit of foundation. Also, consider switching from thick foundations to mineral make-up.


-If you are a girl, you might want to consider getting on the pill. It regulates the hormones that can cause breakouts before and during your period and keeps your skin healthy looking all month.


-If you must squeeze a spot, wash your hands thoroughly first, and squeeze it very gently. Don't use your fingernails; spots are temporary, but doing this can cause scars and those are permanent! If it doesn't pop, don't squeeze harder. This is a sign that the infection is still quite deep under the skin's surface and forcing the pus out can damage your skin. Wait for a few days and then have another go, or try drying it out with a natural remedy such as toothpaste or Vasenol.


-Remember to moisturize inside and outside. Drink plenty of water during the day to moisturize your 
skin from inside your body and apply moisturizer to your skin to moisturize from outside of your body.


:)

Thursday, September 8, 2011

Taking Care of Your Skin: Homemade Facial Masks for Every Skin Type


Are you one of those women that tend to use makeup frequently? Or maybe you spend too much time outside in the sun and have a propensity of dry, flaky skin. Or, your stress levels are so high that you’re afraid of getting premature wrinkles at the age of 30?
Here are some very affordable, great homemade facial masks you can use to help rejuvenate and eliminate old skin cells, leaving you with a new healthy, glowing coat of skin that will radiate anywhere!


Step 1: Eliminating blackheads on your nose using homemade pore strips


Things you’ll need:
  • 1 tablespoon of milk
  • 1 tablespoon of flavorless gelatin


When you have these ingredients, stir them in a microwavable cup until it’s thick and clunky. Then, put it in the microwave for no more than 10 seconds. You’ll know it’s ready when it’s gooey looking and rather stiff.
After waiting for it to cool off, grab an old foundation or small eyeshadow brush you don’t use anymore and apply it evenly onto your nose, assuring that it spreads all over your pores and onto the creases of your nose.
Afterwards, wait about 10 minutes until the substance dries completely and it’s very stiff. Grabbing the ends of one side of the mask, grab and slowly peel it off your nose. You’ll notice that the majority of the oils that were on your skin and most of the blackheads are stuck onto the pore strip! It’s really quite amazing seeing the results. To make sure that it really does work, it has to be completely dry and stiff so that it can yank off all those blackheads and dead skin.


Step 2: Eliminating dead skin cells and dirt from your pores


Sometimes, when we tend to use makeup on a daily basis, or when we spend all day working and busy, we get oils and dirt on our skin that leads to breakouts. Therefore, I recommend using an oil free foundation if you love makeup, like I do. Also, make sure to wash off your makeup every single night with an exfoliating scrub to eliminate all that dead skin and makeup on your face.
Something that you can do once a week is a honey-egg based mask that not only hidrates your skin, but it also gets rid of any dirt or makeup on your skin.

Things you’ll need:
  • One egg
  • Honey
  • Any peel off mask you may have at home (this is optional)


Now, the first thing you’ll have to do is open the egg and separate the egg white from the yolk carefully, ensuring that the yolk is intact. Using a fork beat the egg white until small bubbles cover the top coat. Make sure not to throw away the yolk, since we’ll use this later on!

Now mix the honey, egg white, and your peel off mask if you have one together and make sure that the ingredients are all unified. With the same brush you used before (making sure that it’s washed and clean) apply the facial mask all over your face, assuring that you apply a thick coat on your forehead, cheeks, nose and chin. Avoid applying it too close to your eyes as you’ll be peeling it off afterwards.

After about 15 minutes, the mask will become so stiff and hard that you won’t be able to smile without feeling like you’ve had botox applied on your entire face! This mask is great, since it tightens up your pores leaving you with a temporary facelift and refreshing the skin. When you feel like it’s stiff enough and completely dry, peel it off slowly and gently. If you haven’t used a peel off mask, then wash it off using your hands or a gently applicator. 

Pat your skin dry; don’t scrub your skin with the towel! This leads to redness and damages the skin, especially now that your pores have absorbed all the ingredients. You’ll feel your skin very soft and smooth, since the honey works as a natural moisturizer.


Now, before you finish, I told you before not to throw the egg yolk away. That’s because if you don’t have honey at home, you can use the egg yolk afterwards as a natural moisturizer! Just follow the same, simple steps: Apply, Leave In for 10 Minutes, and finally Wash Off.


Use an acne cream or any type of cream that can refresh your skin after you’ve applied the mask to help your pores close. To ensure that they aren’t open and exposed to more dust and dirt, run an ice around your skin to help speed up the process. The colder your skin, the tighter your pores are going to be.


Step 3: Everyday skin care


It’s very important to protect your skin from the weather, makeup and to avoid wrinkles. Therefore, a proper daily skin care routine is vital to keep your skin bright and healthy, and dirt free of course! Applying this face mask at least once every week is great to keep your skin young and smooth.

Also, using an everyday face cream with some SPF factor in it to prevent the UV sun rays entering your skin is something that we should all do. Any brand from Pond’s to ProActiv is great as long as its oil free and with sun protection included in it.


You can also get great sun protection from some, if not most powder and foundations on the market. Tinted moisturizer is a great alternative as well, since you know you’re using a daily moisturizer as well as sun protection all in one.

Another great tip to having great, healthy skin is how to properly remove your makeup at night. Using cotton balls and your favorite skin makeup remover, softly and gently remove your makeup, using small circles around your skin and avoiding tight and tough tugs. This can and will lead to wrinkles and dried out skin. Make sure that when you’re going around your eyes that you softly remove the makeup without pulling on them since this can lead to premature wrinkles.


So there you have it, a great, simple and easy way to take care of your skin without buying overly expensive products or spending tons of money on professional facial cleansers. Obviously you’ll see the results after several weeks of using the facial masks. Trying with new products to see which ones work best for your skin is also an important factor to take into account.

Hope these tips work and good luck trying out these tips!


Beautiful!

Friday, September 2, 2011

How to Make Your Hair Grow Faster


We all want beautiful, long hair. Well, at least most of do! Therefore, using these very easy and simple tips are going to help you get that long, healthy hair you've always dreamed of. Your hair is a natural sign of just how healthy you can be, since it also needs nutrition and vitamins just like your body does. Keep on reading to see what great and easy ways you can make your hair grow longer!


Keep your stress levels on low!

One of the main reasons for hair loss is stress. I've met tons of people complaining about how there hair falls out in hand fulls when they wash there hair. So if lately you've been feeling stressed out too often, chances are your hair will see the side effects of this. The more care free you are, the more chances you have of getting long and glorious hair fast.


Keep your hair in excellent condition

Nobody wants long, dull hair. So going to your hairdresser frequently will help you maintain your hair in great condition. These are two simple and cheap things to ask when you go:

1. Just ask for the tips to be cut. Eliminating split ends will help make your hair grow faster, since the weaker your hair is, the less it's going to grow out. Also, if you straighten your hair a lot like I do, then getting just your split ends cut will help your hair look healthy and soft. I personally despise seeing someone with long, damaged hair. It just doesn't look nice at all! I'd rather have short, healthy hair then that, so make sure to cut out any burnt tips off to help your hair grow.

2. Get a deep-conditioned treatment done. These hair treatments are cheaper than the chemically processed ones, and they're also better for you hair. They'll give you shinier hair and will also help your hair become stronger, so it won't fall out so much! These treatments last only about half an hour, so if you're in a rush, then this treatment is the one for you.

Brush your hair frequently

Combing through your hair every day will help a LOT. I brush my hair every night before I go to sleep, so that way I include it into my schedule so I always remember to do so. Also, when I wake up I also like to comb through it. This will help loosen knots in your hair and also pull the strand outwards to it can grow freely. 

Avoid using tight pony tails or braids

If you need to pull your hair up, or if you're doing a new hair style, then using looser pony tails would be the best way to help your hair grow, since these don't damage your hair strand that much. I like to use clips instead of pony tails, since they're larger and don't tighten onto my hair as a pony tail would. 


So there you have it; simple steps that you can use to make your hair grow faster and longer. Just remember to always brush through it, and make sure to cut your hair frequently to help make it stronger and avoid hair loss. 
The more you take care of your hair like this, the better the chances are that you're going to get fast results! Hope it helps! :)

If you want to contact me, please do at BeautyHairMakeup@gmail.com


Interesting tips:

Hair tends to grow longer during warmer months

Not long enough for you? Try hair extensions! But be careful; make sure you're with a professional when applying them on, since these can damage your hair severely if not applied by somebody with lots of experience in this. Also, see through the options you have, since there are some hair extensions that look nicer and feel more natural than others.


Tuesday, August 2, 2011

How to Get Anime Eyes with Makeup

So I was googling a lot lately and found myself with a fun video tutorial on how to get those big, japan cartoon-look eyes, and thought it looked really unique and different! So I decided to do it on my own eyes and found out that not only am I deciding to wear this look on Halloween, but I also learned some really important stuff when it comes to makeup. Keep on reading to see how to get the perfect anime eyes and give yourself a nice makeup transformation in just 5 minutes!


So anime girls are characterized by their very big, unnatural eye shape, and their thick, wide pupil (or the inside of their eye.) We don't even need to see ourselves in the mirror to realize that obviously us normal humans don't have these big, big eyes that they seem to do. So therefore, creating a wide-eye effect is the real trick to getting cute, wide eyes.

Things you're going to need for this look:
1. Black eyeliner (can be liquid, gel, solid; what works best for  you)
2. White eyeliner
3. Mascara
4. False eyelashes (optional)
5. Nudy color contact lenses; 16 mm in diameter (optional)


Step 1:
If you have contact lenses, then place them in before doing the makeup. I would strongly recommend using Barbie Eye Nudy Blue Contact lenses, since they are 16 mm in diameter, giving your inner eye a bigger, anime look. I purchased mine from SoftLensEyes.com at only $23.50, but be prepared to pay almost $6 for shipping and handling, since they come all the way from Malaysia, Asia!
Here's the link for the contact lenses: Barbie Eye Contacts


Step 2:
To get a wide-eye effect, apply white eyeliner onto your watermark under you eye and on top of it as well, right below your lashes. This technique I realized made my eye really look big, and sort of unnatural. But this will help create that cartoon-like look we're aiming for. 
Also, apply that same white eyeliner just a bit under your bottom lashes as well, to expand the width of your eye. 

Step 3:
Apply mascara just onto your upper lashes, and if you desire, apply your false eyelashes right after you've applied your white eyeliner. Make sure to make them ultra long and thick, to get a doll-like appearance.


Step 4:
Now for the fun part. Using a black eyeliner (I prefer liquid since it gives you a more defined look), outline your upper lid, creating a cat eye, and giving it an extra wing at the end, making your eye appear even bigger.
Now, go right under the white eyeliner you placed before, and outline a thin line starting from the middle of your eye and going outwards, creating a thin line underneath your white eyeliner. Connect it with your upper black eyeliner to create a big wing, or spread it downwards to give yourself a big eyelash look. Try playing around with it to see what you prefer best.
I like to go under and create small eyelashes with my eyeliner to give my eye a bigger look. Again, keep in mind that the bigger, the better the look!

This is just one way you can make your eye look using the steps above, but you can always play around to see how you really want it to look:


If you want to really see how it's done, then go on YouTube and check out some of Michelle Phan's Makeup Tutorials. She's really good and they're easy to follow videos. I'll add the link so you guys can check some of her work out.


Hope you enjoyed!
:)

Monday, August 1, 2011

Cosmetics Must-Have Products

When it comes to makeup, not many people know what should be in their kit. Whether you're a makeup fanatic and adore any type of new products, or just look for a sleek, healthy, everyday look, there are some products every woman out there, no matter what age you are. Here are a few of my favorite products and the ones I'd recommend to those who want a professional look on the go!


Tinted Moisturizer
Most women, no matter what their age, need a good moisturizer that can help smooth out wrinkles and clean up any age or sun damage caused on your skin. Lots of foundations are designed to be absorbed by your skin and can end up worsening your wrinkles. Foundation cakes in fine lines and wrinkles, making them more pronounced than ever, so women who already have a lot of fine lines and wrinkles may discover that foundations only add to problems they most want to hide. 
So using a tinted moisturizer is not only a better option, but it's also wonderful for those looking for an everyday base coat they can apply to their face to both moisturize the skin and leave you with a healthy glow. 
To help you choose a right product for your skin type, I've added some great products that work well with your certain type of skin.


For normal skin, use Neutrogena's Healthy Skin Tinted Moisturizer. It contains a SPF of 20 to add a little sun protection to your face, along with it's great quality, that helps your skin look smooth and soft. 


For dry skin, use Olay Complete Tinted Moisturizer. I've heard this product is rich in vitamins and completely moisturizes the skin for everyday wear. It's great for people with drier skin since the product adds on extra moisturizer for those that have skin that tends to crack or dry with other products. 

Finally, if you find that your skin is rather normal and works fine with almost any product, then use Cover Girl's Smoothers and DuWop's Revolotion Face. These products, although the latter one being on the more expensice side, are great products for those with normal to combined skin types. They work great providing you with everday moisturizing and a foundation coat that can be placed on any skin type. 


Facial Primer
If you're looking for a long lasting effect when wearing makeup, using a facial primer is essential to get that professional look. Ever wonder how come your makeup sort of rubs off by the end of the day, and when you arrive home you feel like your makeup isn't as radiant as it was when you first applied it? That's because throughout the day, your skin adapts to the products you wear, and do to sweat or absorbing it away, your makeup will sooner or later wear off. That's why using a good primer before you apply your makeup is a great way to prepare your skin for makeup, and to help it stay in. 
For those looking to get inexpensive and affordable products, use E.L.F's Studio Mineral Face Primer at only $6 on their online store.  This primer is not only cheap, but gives you a long lasting effect and helps eliminate all those bad experiences you've had with makeup before, such as cracking, wrinkle defines, and others. 
If you're looking for other facial primers to work with, I've added a list of great facial primers you can use as well. 


  • Bare Minerals’ Prime Time
  • Cat Cosmetics Silk Purrfection
  • Clarin’s Smooth Perfecting Touch
  • Clinque’s Pore Minimizer
  • Lancome Perfecting Primer
  • Laura Geller Spackle
  • Lorac Aqua Prime
  • MAC Prep and Prime
  • Nars Makeup Primer
  • Pur Minerals Color Correcting Primer
  • Serious Skin Care Mineral Primer
  • Smashbox Photo Finish
  • Stila Hydrating Primer
  • Vita-K Silky Smooth
  • YBF Neutralizing Face Primer
  • Yves Saint Laurent Matt Touch


Mascara
No makeup session is complete without adding mascara on first. The great magic behind using mascara is the way it naturally widens your eye and gives your look a finished look. If you're not a fan of mascara, or if you feel like your eyelashes aren't long enough to fulfill this, then using false eyelashes is a great alternative. But don't be afraid of using them! They really aren't that difficult to put on. With a little bit of practice, then you'll be a pro in no time. I've added a video on how to apply your false eyelashes easily and some easy tips you can do to hide any mistakes.


When you're just looking for an everday look, then wearing mascara will really make your eyes pop. I personally use Maybelline's Define-A-Lash Volume Mascara and the way the wand is designed really gives your lashes an astonishing look! When choosing mascara, make sure to place special attention on the wand's form, as this is where all the magic goes. Some great mascara products that I've tried are Cover Girl's Lash Blast, and the wand is pretty much the same. Below is a picture of that great wand that helps volumize your lashes. 


Blush 
Our face is specially designed to create natural lines and features that give us our unique aspects. Therefore, using blush whether it's a light pink blush gently applied on our cheekbones, or different shades used to contour every aspect, blush is a must-have product for every woman out there. Using a pink, light shade is really going to give you a soft and healthy glow to your face, so using just one shade of blush is more than enough to give you any look you're aiming for.

One of my future must-have products is Coastal Scents Contour Blush Palette which is only a $20 purchase, and gives you great colors that work on any skin color. Plus, the amount your paying for is a lot and will last you a long time. 
You can purchase this palette here: Coastal Scents Contour Blush Palette
Also, I've added a really good video tutorial on how to apply these shades and any other blush shades out there. This will really help if you're a beginner, or you just wanted to know how to properly apply shades and colors to your cheeks. 


Brushes
You can't paint a house, make dinner, or go to work without the proper tools; and you obviously can't get amazing makeup results without the right brushes! Using specific brushes will really help you create those makeup looks you've always thought to yourself how the celebs can really pull off. Therefore, I've added a list of some very simple, must-have brushes to the list to help you apply your makeup and help it look natural or to make you stand out more.
I've gone ahead and used E.L.F.'s brush products to my list since every brush on here is for $1 (I know, incredible!!!) and they're actually really good brushes. If you want to go on the more professional side, then you can always shop on MAC or Makeup Forever's Website. I'll make sure to add the links at the end of this article for you :)
In the end, they are pretty much the same brush shapes, just made differently. I'd just like you to keep the shape in mind, but the brand is a whole different story.

Eye Shadow Brush
 An eyeshadow brush is very important when applying your makeup. This will help blend, and apply the eyeshadows you want. The problem with those normal eyeshadow brush-sticks they add into your eyeshadow kit is that they don't give you much to work with, so using a brush will help you apply and blend easier.

Smudge Eye Sponge
 This brush will help apply black or darker colored eyeliners onto the edge of your eye, or around your lashes. A small brush like this one will really help get those places where you wouldn't normally get perfectly done with a normal sized eyeshadow brush.

Total Face Brush
 This brush is ideal when applying blush or contouring your face. It is one that I personally use on almost every makeup application, and great quality as well!

Blushing, Bronzing and Blending Brush
 Techincally, the name says it all. A great chose for contouring as well.

Foundation Brush
 This brush is great to help apply smoothly your liquid foundation over your skin. Unlike other products used to apply foundation, this one will help set in your foundation and evenly apply throughout your face.


So there you have it, the must-have products everyone should have. When it comes to makeup, having enough makeup is never enough (hehe), but using the right products will help give you any look you wish to have.

Here's some makeup online stores you can look at and compare products and prices (E.L.F being one of the most affordable)


If you have any questions, please contact me at beautyhairmakeup@gmail.com

Hope you enjoyed!